Monday, November 14, 2016

Heartland Blog Tour


Hello, Hi, Hej, Hei!
Welcome to my day on the Heartland blog tour,  it's very exciting to be sewing side by side with such fabulous makers and with the  HeĆ„rtland Fabric line by Pat Bravo  (Art Gallery Fabrics). Not only has it been a pleasure to use such gorgeous fabric but it's been fun to discover its versatility.

Before we get into the nitty-gritty details- let me encourage you to check out all the makers and their creations as this wonderful event is now in it's 2nd week. The complete list  (just in case you missed them),  is at the end of this post, all with live links, so no excuses..... you will have to wait in real time to see what happens through the rest of this week, with Christopher ( the tattooed quilter) taking the lead tomorrow.

Story of my life lately; come up with what I think is a great idea and then change my mind. Sometimes the change is organic and sometimes it's situational. But what I've learned lately is not to fight it. Change is inevitable, and when it's heading your way, you have to embrace it.

I was so excited to get some of this gorgeous fabric that initially I though I'd make a quilt. (For those of you laughing right now, hold on to that thought). Immediately after settling on the quilt idea,  I went on an amazing trip to the land of fashion and food- Italy- and came back with so many more ideas, one of which was, why not try a wearable quilt. Really, why the heck not!


I live in a place that gets snow in the winter. My family, always trying to be the best stewards of the one planet we all live on, keep our house on the "cool" side during these winter months (my kids say cold, I say cool, tomato, tomahto). I have quilts on the couch and quilts on the beds.  With that thought in mind, I chose the Circular Vest Pattern, from Threads Magazine.  It is a pattern that I have been wanting to try (for a while). It's  also quick, easy and best of all it's free.  There is a minor amount of measuring and math, but if I can do it so can you. Best of all, it falls right into my sewing and quilting happy place;  a pattern that is as versatile as it is stylish and one, if you have the time, can be customized, which is exactly what I did.

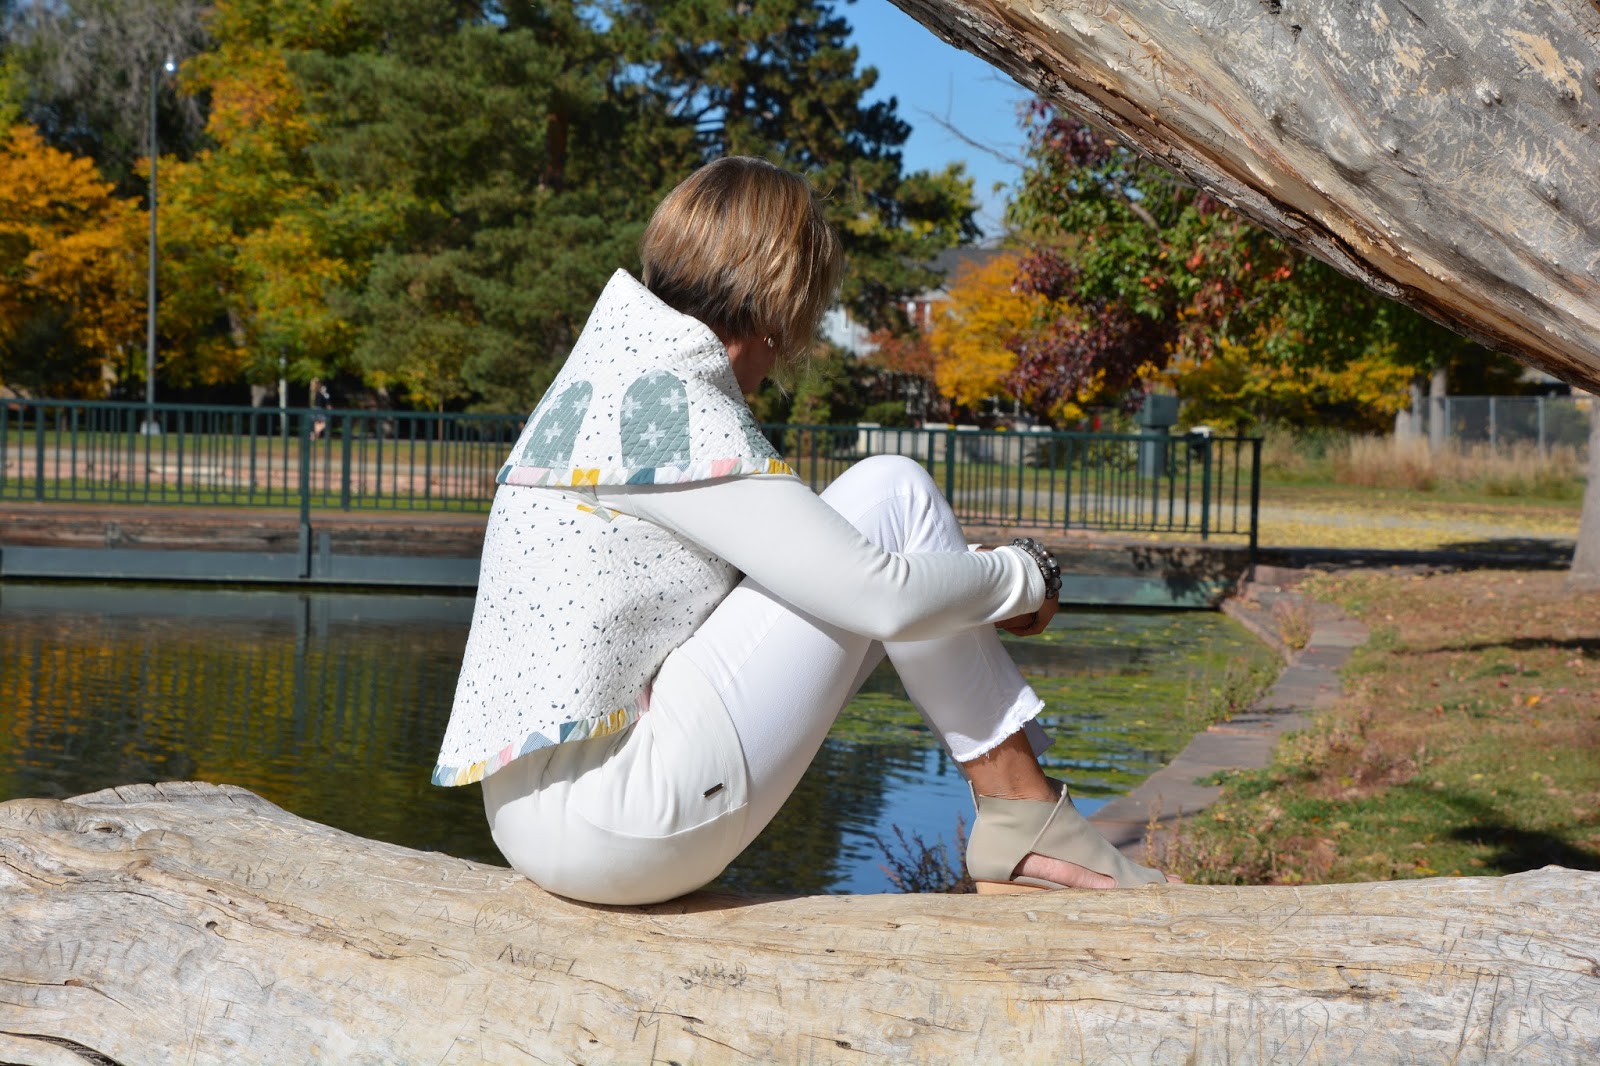
Back shoulder details with inset organic shapes in Unn Cross Silver.
Droppar Moondust for the vest body and Trekant Rows Candid for the binding.

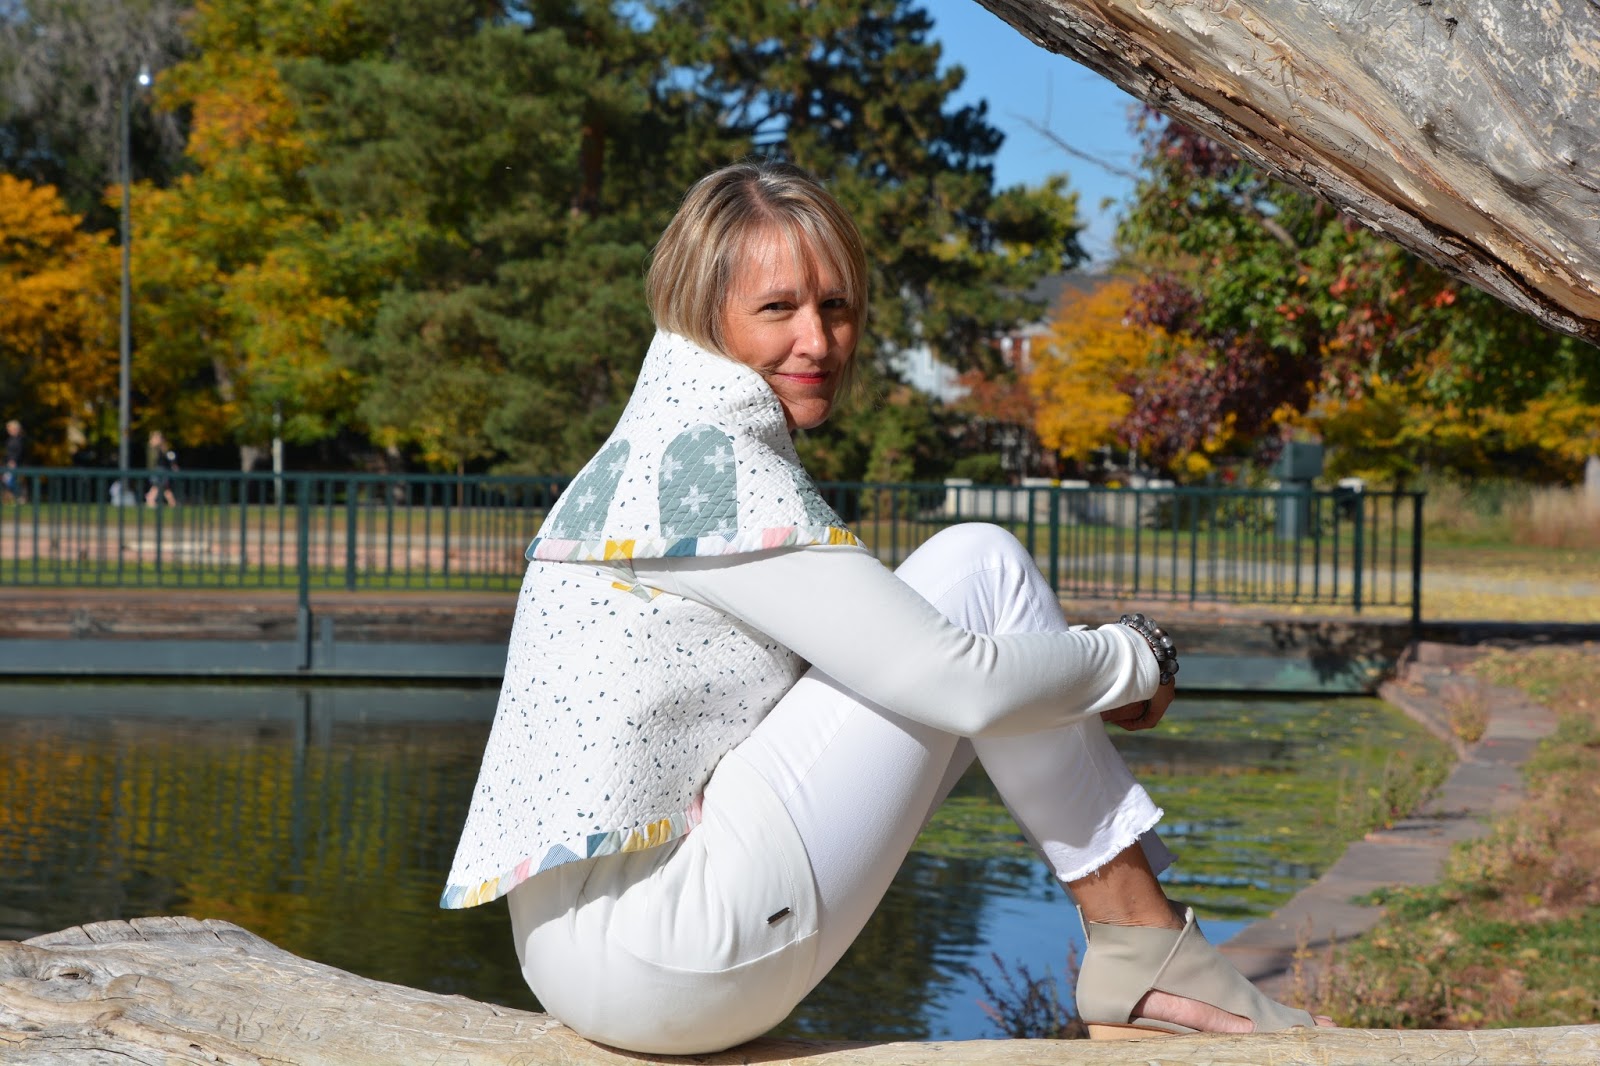
Front details:  Inset organic shapes wrap to the vest front.

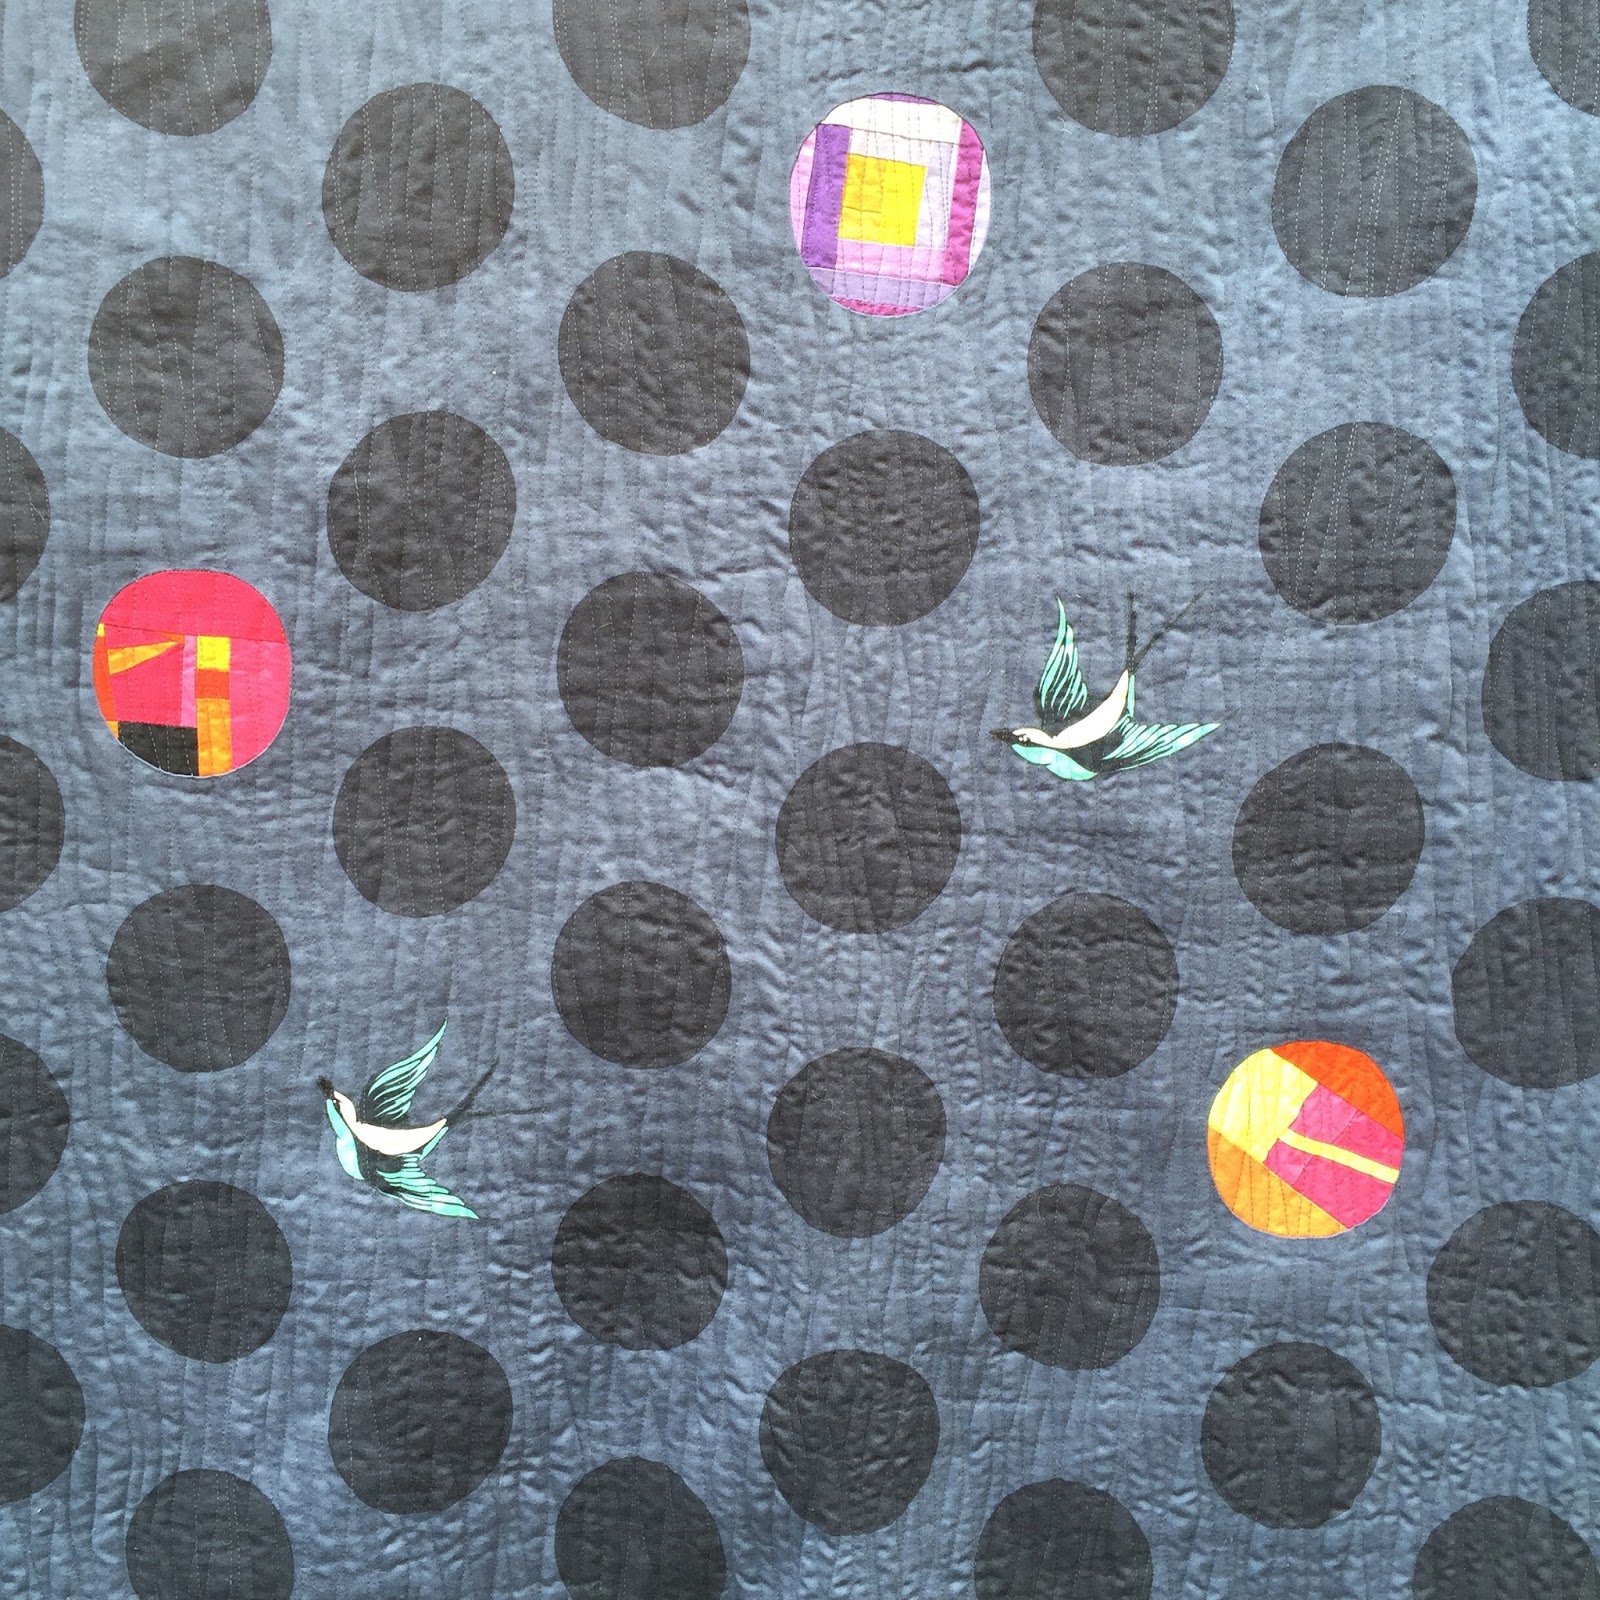
Fabrics used : Art Gallery, 100% quilting cotton from the Heartland Line by Pat Bravo:
Heartland: Droppar Moondust, Trekant Rows Candid, Unn Cross Silver.  I used a pre-washed light weight silk, tencel and cotton lining and bias cut the binding because the pattern is basically a big circle and you need the stretch. The pattern calls for the binding to be applied by machine but this one is attached inside and out by hand, allowing for further ease around the circular vest. All the fabrics were washed prior to construction assuring the completed project will remain true to size and that the finished garment can be machine laundered when complete.


Thread used:
Aurifil threads in 50 wt, 100% cotton for the piecing and 28 weight, 100% cotton for the quilting. The quilting is kept simple and compliments the circular design.


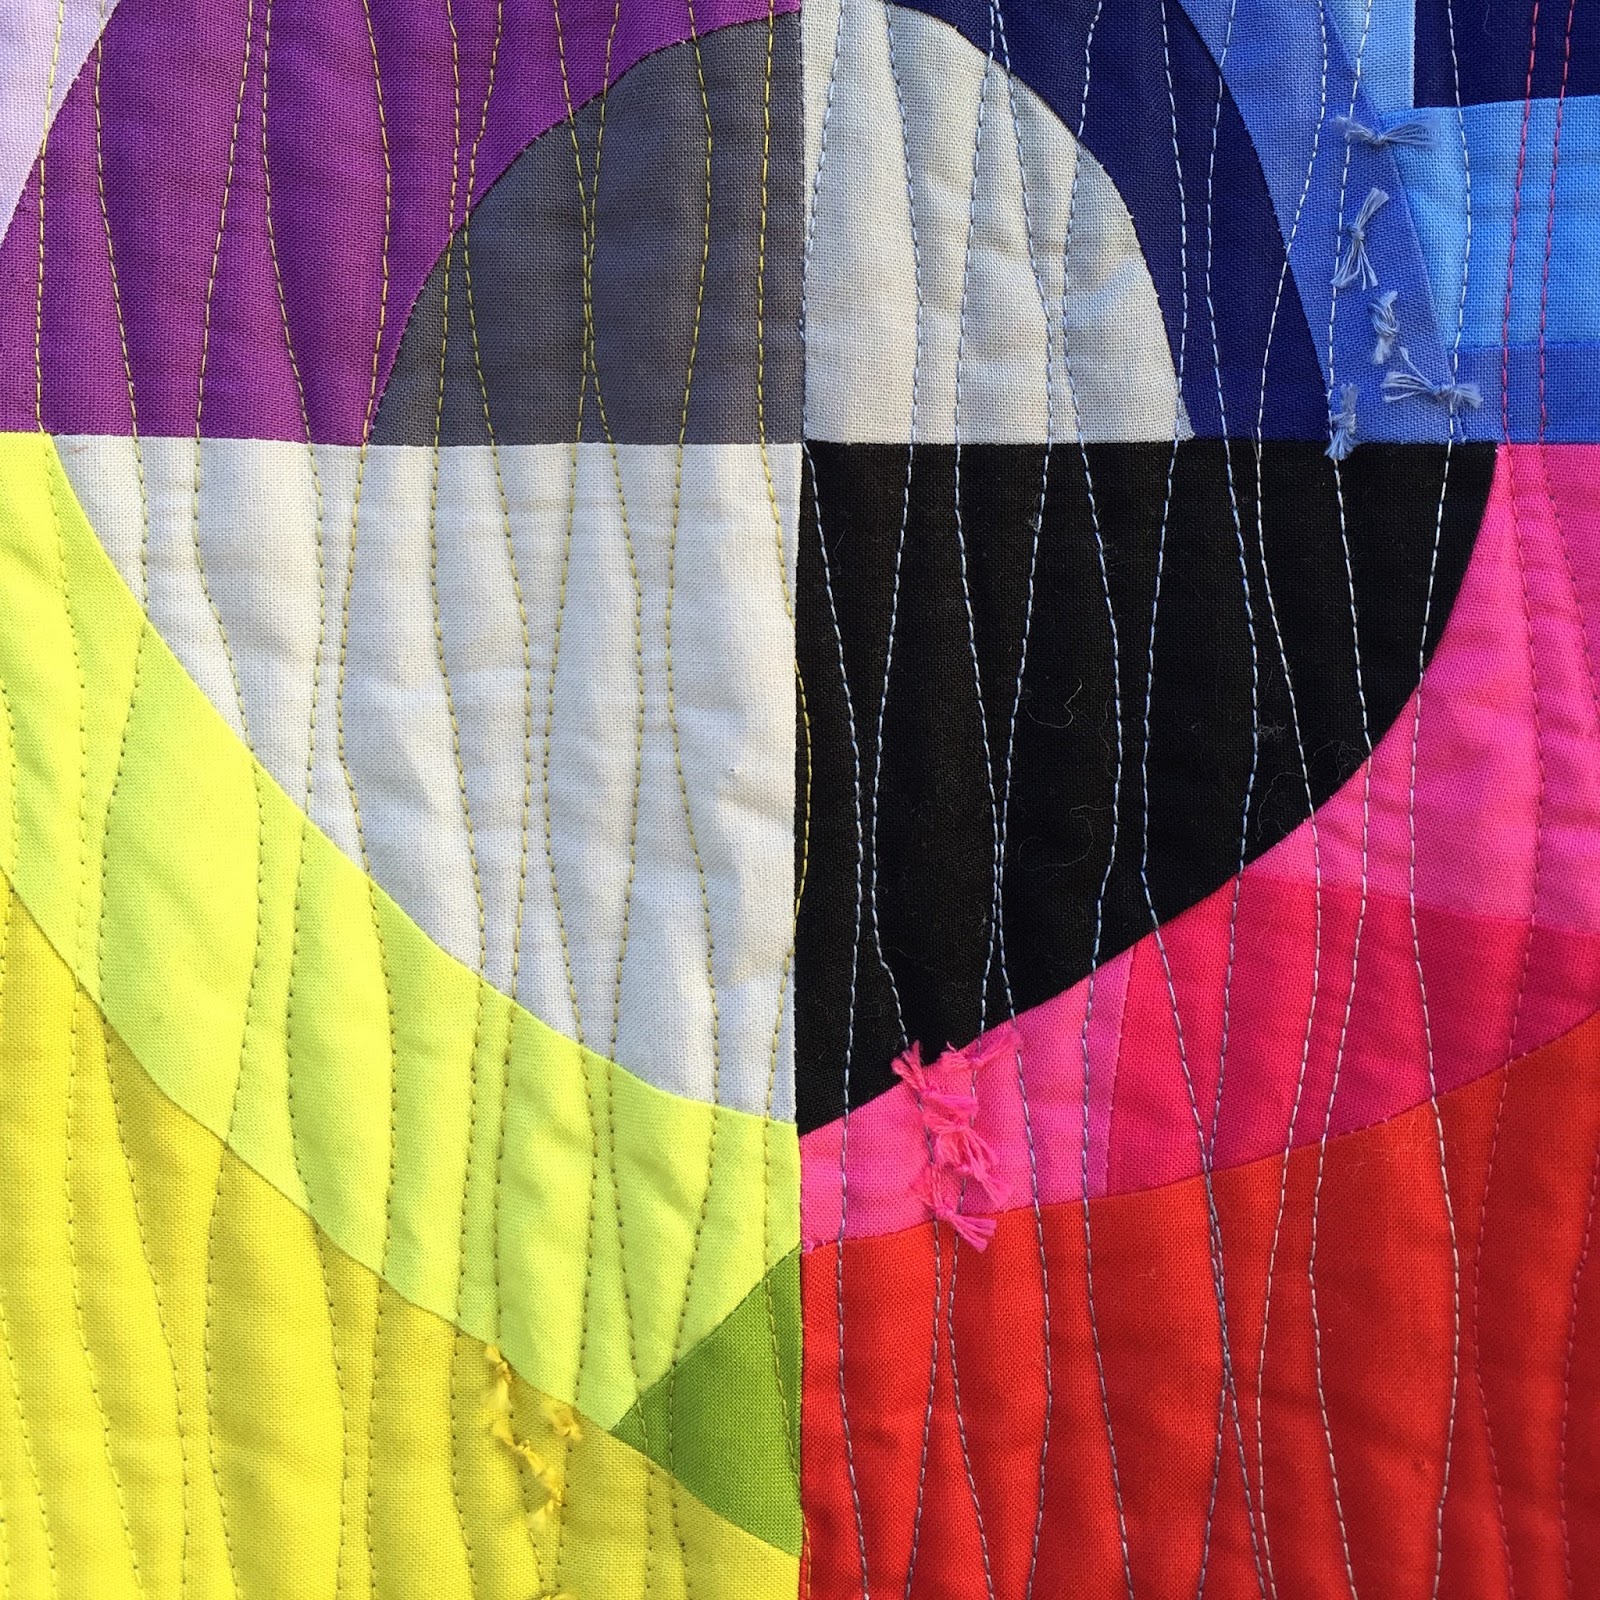
Piecing and quilting details were inspired by a trip to Scandinavia several years ago, homage to the roots of Pat's Heartland Fabric line. I kept the piecing simple, organic and repetitive, limiting it to just the shoulder/collar.

Using a thick paper template and a freehand sketched organic shape,  I transferred the shape to the shoulder/collar area of the Droppar fabric by tracing using a water soluble blue fabric marker. This was repeated 9 times, paying attention to the spacing between the shapes. The design was then cut out leaving a 1/4" seam allowance. For stability, the Heartland Droppar fabric was fused to Freezer paper before starting.

In order to keep the curves smooth, small notches were cut in the curved area and repeated 9 more times. The freezer paper was then removed and the seam allowance pressed to the wrong side easing the fabric through the curves. Unn Cross in Silver was then glue basted to the wrong side. The inset pieces were then sewn in place using the pressed seam allowances as the sewing guide. Glue basting is critical- keeping the fabric in place while sewing through all the tight curves.


piecing, binding and quilting details
Finally,  the binding compliments the other fabrics with its pops of yellow and pink along with the grays found in the Unn Cross and the Blue-green found in the Droppar Moondust (vest body).

The quilting is linear but is not stitched as you might expect, top-to-bottom. It's actually stitched from the center (mid shoulder blade) in quadrants, which gives some play across the shoulders in a fabric that is not otherwise stretchy.
Quilting details. The linear stitching originates from mid shoulder blade (between the 2 bound arm openings) and is straight stitched in quadrants.


And because we're all having so much fun, I do have a small give away of some fabric I requested but did not have the opportunity to incorporate into my design.... (change is GOOD!). It's all contained in a simple drawstring bag (pattern modified to use fabric at hand from the Heartland collection).

If you'd like a chance to win this drawstring bag with some of this awesome new fabric, please leave a comment here on this post. Please use your fabric to create unique projects and make sure you let Pat know what you're making by using the following hashtags on social media. #patbravodesigns  #heartlandfabrics  #artgalleryfabrics  @patbravodesign on Instagram, Facebook and Twitter.

If you want to keep up with me, I'm here and on IG @spontaneousthreads.

Finally, a big thank you to Amy Friend for organizing this fun event and to Pat Bravo and Art Gallery for the gorgeous Heartland fabric and if you're looking for a fabulous quilt to make with these fabrics Amy has designed a beautiful one just for you!

Here is your stellar line-up of past and future makers, go see what they have been creating.

November 7: Debbie http://aquilterstable.blogspot.com
November 8: Jess http://www.craftinessisnotoptional.com/ and
                     Charise http://charisecreates.blogspot.com/
November 9: Jade http://stitchmischief.com
November 10: Amanda http://www.jedicraftgirl.com/
November 11: Kari http://craft-happy.blogspot.com
Weekend break for sewing and creating
November 14: Me
November 15: Christopher ( the tatooedquilter.com) and the other amazing makers
November 16-18:
                        Kerry ( kidgiddy.blogspot.com)
                        Nicole (wildboho.com)
                        Krista (poppyprintcreates.blogspot.com)


photo credits: Ruchi Brunvand (@rbrunvand) (Yes, that's me in the pictures- shocking, I know!)

Monday, October 24, 2016

I am #MIGHTYLUCKY


I may not be trending but I am #MightyLucky to be part of the 2017 line up of really incredible quilt makers, designers, artists and authors. In it's second year, the  2017 program follows on the heels of an incredibly successful 2016 season. For you just learning of this program, here is what you need to know.  

Mighty Lucky Quilting Club

The Mighty Lucky Quilting Club is the first monthly subscription club of its kind that focuses on challenging you with design concepts in the quilt making process. It's like a gym membership for quilters! From playing with improvisation and negative space to finding inspiration and creating your own compositions …and everything in between...you’ll be challenged each month with a new skill to try, with pages of instructions, examples, and inspiration from one of your favorite quilters.
In the Mighty Lucky Quilting Club, a popular quilt designer/trainer each month will provide a challenge for you to work through along with materials needed, guided instruction, detailed techniques and plenty of inspirational images. You can try it once and set it aside. You can turn the challenge into a full quilt if you’d like. You can do the challenge more than once! And of course you’ll want to take photos and share your efforts with others in the club as you work through the projects each month #mightylucky on Instagram and Twitter and post to Facebook at www.facebook.com/mightyluckyquiltingclub/.
I am also fortunate to be able to give one lucky person a full years subscription to the Mighty Lucky Quilting Club. To be eligible to win you need to comment here.  The subscription is open anyone worldwide. Good luck!

I encourage you to sign up and to join me and others who are already #Mightlylucky.
So without further ado, here is the line up for 2017: (see I told you they were awesome!). Go, go now and sign up.


January- Amy Friend, February- Emily Herrick, March- Jacquie Gering, April- Krista Fleckenstein, May- Amy Smart, June- Kim Eichler-Messmer , July- Dan Rouse, August- Melissa Aversions, September- Emma Jean Jansen, October- Deborah Moebes, November- Camille Roskelley, December- Stephanie Ruyle


Monday, June 20, 2016

Life's Journey


For my father in law, after the death of my mother  in law.
His second quilt,  (first quilt here). A specific request granted.

"Life's Journey"


87" x 88"
derived from a Bee Sewcial block made for Marci


2016 theme of "scale" (from 12" block to 88" queen quilt)

Request: pink, somewhere in the quilt (pink was one of my Mother in Laws favorite color)

Original design
Kona cotton solids in various blues
Bernina #4 stitch stretched x4 mostly in light gray with 5 rows of neon pink (for the 5 decades of marriage they shared).
Pieced, mostly color matched,  2" straight of grain binding with 2 small pops of pink.

I also included a portion of one of my mother in laws famous prayer flag prints

100% cotton warm and natural batting.
The back is pieced to include fabrics that my in laws have purchased for me from their around the world travels, specifically Miramar, Australia and Africa.


The title "Life's Journey" is not mine. As I was piecing the back, I was pulling fabrics that coordinated, but also reminded me a bit of my father in law. I came across a very old cotton print with it's selvedge still attached. On that selvedge was the name of the fabric, "Life's Journey". There is no way I could have anticipated or chosen a better name.

Saturday, May 7, 2016

Ties that Bind

In my rather philosophical state of mind I chose a thoughtful and telling title for this quilt, which is a gift for another quilter who is making a quilt for me. We are working from a similar script with self curated selection of Kona solid fabrics.
Ties that Bind, a #twinsisterscityquilt
front
 Daughter, Doctor, Wife, Mother, Quilter, Traveler, Friend. These are 7 powerful words that describe more than a few people. These are 7 powerful words that I share with a friend. We are not old friends, but became instant ones; someone you are lucky to meet and like immediately.

We hatched a plan about a year ago to make each other quilts under the byline #twinsisterscityquilt (on IG). There is much in that name, overlapping similarities that cannot be ignored. Easterners that are now Westerners anchored by family to the Rocky Mountains, birthdays that easily morph one into the other, a quirky appreciation for rules and a daring spirit to break some of them.

My quilt has so many little things that she will appreciate, least of which are the threads. Over a dozen colors, some collected while we walked the miles and miles of vendor aisles at the International Quilt Festival. I won some, I bought some and I used them all on this quilt. Threads of differing weights, 28, 40 and 50 give incredible texture to the wavy line "matchstick" quilting. I even popped one row of neon pink into the mix. I deliberated about that thread for more than you would think necessary. I know, if you're reading this Kathryn, you remember that well.
Hard to see, but there are many different colors of threads used in the quilting
I bound the quilt with a subtle 2" straight of grain binding to which I added a tiny pop of the Kona color of the year, Highlight, and a sliver of my signature retroreflective glass nano particle fabric. I started the quilt in 2015, but finished in early 2016, so the nano particle fabric is my nod to 2015 making, like a hidden signature that Kathryn will understand.
binding details


I backed the quilt with fabric from Kathryn's favorite designer, Tula Pink, and kept  my deliberate inability to leave things alone (some quilting rule breaking), by incorporating improv circle replacements for some of Tula's polka dots. Just 3. Tula even approves!!!!
Ties that Bind, back
Lastly, the something new, my 2016, Wabi-Sabi, of this quilt is the hand tied threads, clustered and scattered across the top. They are tone on tone, one set in each color used on the quilt. They are closely cropped, lending 3-D texture to the quilts otherwise heavily quilted surface. These are the "Ties that Bind" . Ties of Friendship and Family, of shared passions and creativity, and of quilts.
some of the many threads in all kinds of weights used on this quilt

I suspect that over time they will fall off, leaving little color pops of spontaneously found threads (yes, this was deliberate) in unexpected places. Right now, for some many reasons, I'm loving the idea of impermanence and change. Kathryn when you find them, about the house, in the dryer lint bin, stuck in your vacuum,  I hope they make you smile.


"Ties that Bind" ( a #twinsisterscityquilt for Kathryn)
54 x 63"
Improv pieced, curated Kona cotton solids to a set script
Tula Pink Backing, Free Fall 100% cotton with 3 improv inset circles from fabric remnants from piecing the top.
100% wool Quilters Dream Batting
Quilted on a Domestic Bernina, modified #4 stitch (length 3, stretched 5x)
colored matched cluster of ties

Threads: Aurifil assorted colors in 50, 40 and 28 weights, 100% cotton; Glide "Hope" 100% poly (top)
40 weight Aurifil #2645 (bobbin). Other assorted threads, various manufacturers in blues, greens, purples, yellows and pinks.
2" SOG binding, color matched with incorporation of Kona 2016 color of the year : Highlight and glass, retroreflective nano particle fabric.
Nano particle fabric in the binding, photographed with the flash on.

Enjoy dear friend! It was made for YOU.


Friday, March 25, 2016

Caution- Curves Ahead

One of the things I love about collaborative projects is the things you learn and share. Case in point, a lovely (and slightly irreverent) discussion about piecing, specifically curved piecing that happened  with Bee Sewcialites at QuiltCon over Chinese food. It's remarkable how many ways you can put a curve together and there are so many wonderful, detailed tutorials out there.

For me, I have tried many of these, and have had great success with most of them. But since I'm a garment sewer first and had a few skills from that, I realized that perhaps some of the techniques used to inset sleeve scythes might be helpful when tackling exaggerated pieced curves in quilting.

March's prompt for our Bee Sewcial (#beesewcial/ #inspiredbybeesewcial on IG), was "Layers". A word rich in meaning and potential. One of the things I have thought about, especially after making a fun baby quilt for a friend, was all the different ways maps have influenced civilization, and all the different types of maps that exist. I used a special "map" (flight path map) in the quilting of "Flight Path".
Flight Path
photo compliments of Nathalie Bearden

But, one type of map has been calling to me, A topographical map or topo map. But instead of quilting a topo map and while keeping in mind this months prompt, I tackled piecing one.

Bee Sewcial March Topo  block for Hillary,
Entropy Always Wins


To do that, you need to have a confident handle on curves. I use a mixed skill base for that, and because I dislike using throwaway materials (paper/freezer paper), have developed a modified technique that works, I think, rather well.

Felicity (@felicityquilts), also used this technique in her months Bee Sewcial block and it prompted a discussion of the steps in construction of dramatic curves. So, here goes…..
(disclaimer: I'm a visual person, so I learn most by studying pictures. I read directions only when necessary, and I follow them as needed. I have included both in this discussion, pick what works for you, BUT the only way you'll become comfortable with curves is to actually practice making them).

Materials:
Fabrics for project
Marking pencil or pen
Sharp scissors (very important)
Hot iron
Sewing machine with 1/4" foot, thread
Water solvable glue (I use Elmers, but any fabric glue that you can was wash out works).


1. Choose a starting fabric. If you have a finished size in mind, have your starting fabric several inches larger in all directions since you'll be trimming to size at the end.
2. If you have a design in mind, and are a planner, great. Just going for it is great too.
3. On the right side of your fabric, using your marking pencil/pen, draw out a curved line.
drawn curve in faint white with making pencil

4. Cut away the fabric leaving a  1/4" seam allowance.

5. Using your sharp scissors, clip the curves with tiny, closely spaced v's.  DON'T clip past your drawn curve.

 Continue along the length of your curve.

6. Turn your fabric to the wrong side and press the seam to the back of the fabric, using the drawn seam line as a guide and ease the curve with your fingers, carefully folding back the fabric and pressing as you do.  Do not worry if you press back more than 1/4". The clipped v's  aid in the pressing especially around dramatic curves.

Concave curves press easier than convex ones. You may have to overlap some of the v's and press slowly on the convex portions. You can use Flatter, starch or just water to help you at this point. Go slow and use a hot iron. Try to keep the pressed curves smooth. Having many tiny cut v's make smoother curves.
7. Flip fabric to right side, tuck any unruly clipped curves to the back, press.
8. Select your next fabric and lay out on your pressing surface right sides up. Place your prepped, ironed fabric right sides up on top and adjust to your satisfaction. Press through both fabrics tucking back any unruly clipped seams.
fabric to be added at bottom.
pieced curves with clipped pressed seams at top

9. Carefully lift the top fabric at one end and add dots or a thin bead of glue part way along the clipped edge. Keep glue restricted to the clipped edge only. Gently place the fabric back in place and iron to set. Keep lifting, gluing and ironing until the entire curved edge is set in place.
I use Elmer Glue in a glue dispensing bottle

Occasionally glue gets on the front. Don't fret , it washes out.

10. Flip to back side and gently trim  using the clipped edge as your guild for the trimming. Be careful here to not cut your recently pieced fabric.

11. Using the clipped and now trimmed edge, as your guide, clip the areas of the added fabric using the already clipped and glued v's as your guide.
make sure your v's are clipped before sewing

12. Sew, in the pressed seam along the crease created by ironing. Go slowly around the curves easing the fabric out of the way, especially around the dramatic curves. I use a 1/4" foot not for measuring but so that I can see what I'm doing.
sew carefully along the pressed crease

13. Go back to your ironing board, pressing the seam to one side. Your fabric will fall to one side or the other. Press to that side.
14. Admire your work.
15. Repeat these steps as many times as necessary to complete your design.

I use this method for inset circles and circuloid shapes (the blue portion of the Topo block) and for the pupil in my other "Layers" March Bee Sewcial block.
Pupil added with identical method. Even with many pieced seams this method works well.
Have fun with curves!!!

Saturday, February 27, 2016

Wabi-Sabi 2016

Each year, or at least for the past several in which I have been quilt making, I tinker with a design element, or a design theme. I like to, if possible use it frequently and in different situations. I have toyed with metallic threads, inset seams, nano particle fabric and doing important things to binding. Sometimes juggling all design concepts in a single composition.
Retroreflective
inset seaming with nano particle material
Metallic thread used for some quilting
retroreflective insert extends into binding


I confess to having picked-out stitching, redone piecing and ripped out and replaced whole portions of quilts to make them "perfect" (to me).

hand quilted binding (Dark Shadows)

Metallic thread quilted double-sided binding (Binary)
 But after a series of rather revealing life events centering around homeownership, cars and health, teenagers and older parents, I have learned a few new things about myself (old horse, new tricks).

Most importantly, there are just some things I can do NOTHING about. I cannot repair the roof on my house, or the dent in my car. We all age, despite the media hype that 50 is the new 30. Most of us become empty nesters, at least for a while and if we are lucky to have had parents in our lives for all of our lives, then they do get old and eventually need our help. When all of these things happen at about the same time it's overwhelming. Having coping skills that involve creating is imperative.

To kick off the new year,   I got a book by Marie Kondo. "The life-changing magic of tidying up". And since I did need a little magic in my life, I read her book, cover to cover. I will confess to not dealing with every stitch of clothing in one event, but I have made at least 6 trips to Goodwill with carfuls of stuff. It feels good. I found some things that I had thought lost. One of her essential tenants is holding each item you own and deciding if it brings you joy. Answer Yes and you keep the item, anything else goes. A bit drastic I know, but for me, it was a journey with another profound discovery.

Wabi-Sabi: "the art of finding beauty in imperfection…to see the singular beauty in something that at first does not appear obviously beautiful. Bringing wabi-sabi into ones life doesn't require money or even special skills. It takes a mind quiet enough to appreciate muted beauty, courage not to fear bareness, willingness to accept things as they are. It depends on the ability to slow down, shifting balance from doing to being, to appreciating rather than perfecting".

"Once quiet you can appreciate the minute detail that gives something character, you have permission to look but also touch. And in the process of connection, you don't have to understand why you are drawn to something, but you do have to accept it as it is. Wabi-Sabi is a state of mind and a way of being. It is the subtle art of being at peace with yourself and your surroundings".

I'm still in the process of sorting and de-cluttering, general tidying-up and most importantly, being at peace,  but I'm moving forward. I have brought some of this centering into my creating too. I have expanded my creative space to include virtual inspiration from many friends and acquaintances on social media. My 2016 already includes collaborative work and trades with several friends. I will continue to ask and accept creative comments via social media and from my guild. I'm teaching 12 college engineers/scientists to be quilters. We have met twice already and cannot tell you how wonderful it is to have new quilters in the making and in my life.

 I will, in the spirit of life-changing events and collaboration, gift several projects this year. If I can keep myself organized I will tag these collaborative endeavors as #colabquiltproject.  I have already begun by sending a small mini quilt to a thoughtful IG follower.

Mini quilt- Gifted
Black batting accentuates the seaming which is a nod shadowing. It happens and I'm OK with it.
Machine and hand quilted
Back, pieced

 I will have a larger quilt to give away at years end. It's all good, really good. Most of my day to day ramblings and posting occur over on Instagram. I hail by the same name, spontaneousthreads.

This year it's all about the process. A hands-on, celebration of  letting go. About making mistakes and accepting them for what they really are, growth, discovery and sometimes if I'm lucky, hidden beauty……….. and realizing at the end of the day, I am OK with all of that.


Friday, February 12, 2016

Something more, nothing less

The last of 2015 and a great way say goodbye and thanks.


This is the 5th quilt of this year that was made entirely from scraps. While the other 4 were solids only projects, smaller in scale, this, the largest of the projects, is made entirely from prints. Since I sew less frequently with prints these days, it's taken a few years to accumulate the raw material. The prints scraps drawer was large and I sorted (mostly strips and variations of rectangles) into ROYGBIV piles. The whites/grays and blacks were reserved for the negative space.

I posted while I made and reflected too. I hatched 2 plans. One to make a quit from the scraps and, then to share whatever was left over with whomever would take them.

I started piecing the week before the terrible events in Paris.  By the time I got to purple I was struggling with the color and the piecing, because my "selection" was limited in both volume and variety. Then, Paris happened and I just couldn't begin to understand that level of hatred and violence so I gave my pain to the purple and joined the sorrow of the  greater world as we all searched  for the over reaching question of Why? Right them and there, in the midst of literally picking up the pieces and trying to put something together,  I knew what had to happen.

The main color blocks are arranged more or less in a rainbow spectrum, discreet and isolated,  I'm sure the in-your-face symbolism is lost on no one.  The improv pieced negative space starts with dominant whites in the upper left (yes, more symbolism) and descends to black in the lower left (I know, I know). Some asked and the answer to why black and purple… it's because that is what it felt like when I was piecing purple… I was struggling and the world around me was dark and sad,  looking for answers and finding none.

Despite current events,  there is a bright side to the quilt as well, all those pieces have memories attached to them, memories that I got to revisit when making this quilt. Family quilts, graduation gifts, celebrations of babies and birthdays. A few pieces are from quilts that have hung in Houston and at QuiltCon. A piece or 2 from quilts that have won ribbons. The oldest piece is from a  quilt that my son (now 21) and I made together when he was in kindergarden.

I also learned something more about myself. Most of my "precious" fabric scraps were all orange, and what I deem precious may not be what everyone else holds dear.  No surprise there. I had more blues than any other color,  My greens were mostly yellow-green, bright green and an occasional blue-green. I include pink in the rainbow because  like it.  I had the least amount of purple.  I deliberately chose to piece the background negative space from light to dark because that's what made the most sense while I was making this quilt. I almost  had enough scraps to make that happen, but was a bit shy of my mark in the print selection of medium to dark grays. I did have enough scraps, just not enough variety of scraps.  It didn't stop me from cutting a few additional strips of gray prints from my stash to complete the quilt top.  Those extra scraps will now go to good homes.

The back is scrappy pieced from large stash pieces that have sat on my shelves for a time (OK, years). I learned something here too. I had in my possession large floral and floral/damask like prints in all the colors that I needed ( I wonder why?). I must at some time have desired to own these, and I have used them in projects past because they were all odd shapes (i.e.: not standard cuts). I think it funny that they are nearly all by different designers (yet all floral/damask), and I had just enough to piece this back. Coincidence? Maybe…… maybe not. I also pieced the back keeping the prints directional. Once done, I realized that the direction was not the way I intended. But I also let that go. I didn't have other fabric to use and those were the pieces that made the back. It is what it is and I am OK with that.

Besides the greater metaphorical putting together the pieces while making this quilt, I  literally picked up the pieces in its making. Pulled them off the floor where they had been sorted into piles by color. I know some people save precious fabric for a dream project, but the other thing I learned is those "precious" scraps are just a piece of fabric. Taken by themselves, they can't keep you warm, offer you comfort or even fill your belly if you're hungry. (I guess if they are precious enough, you could sell them piece by piece), but if you take all those pieces and make them into a quilt you can do all three of those things. You will have created something greater that can give comfort, can keep you warm and in the most desperate times could be sold or traded for food. Something to think on. Something that I won't forget.

Maybe this quilt was destined to happen, maybe I just had to wait long enough for all the pieces to fall into place.


"Accumulated"
74 x 86"
original design, improv pieced
made entirely from curated print scraps of various ages and makers. Nearly all 100% cotton, a few, cotton/linen blend.
Batting: 100% wool Quilters Dream
Thread: (piecing) Aurifil 50 wt 100% cotton in #2021
             (quilting) Aurifil 40 wt 100% cotton #  bobbin and top thread
Quilting: Bernina modified #4 stitch, stretched 4x, Bernina domestic machine 820.
Binding: scrappy color graded to match negative space, 2" SOG